



Most trading accounts are not destroyed by a bad strategy. They are destroyed by one trade that was simply too big, placed on a day the market moved the wrong way.
Learning how to size a position is the skill that prevents that. It decides how much you lose when you are wrong, which matters far more than how often you are right.
This guide walks through a simple sizing method using real trades on AUD/USD and gold. It also shows what happens when the exact same trade is placed at the wrong size.
What Is Position Sizing?
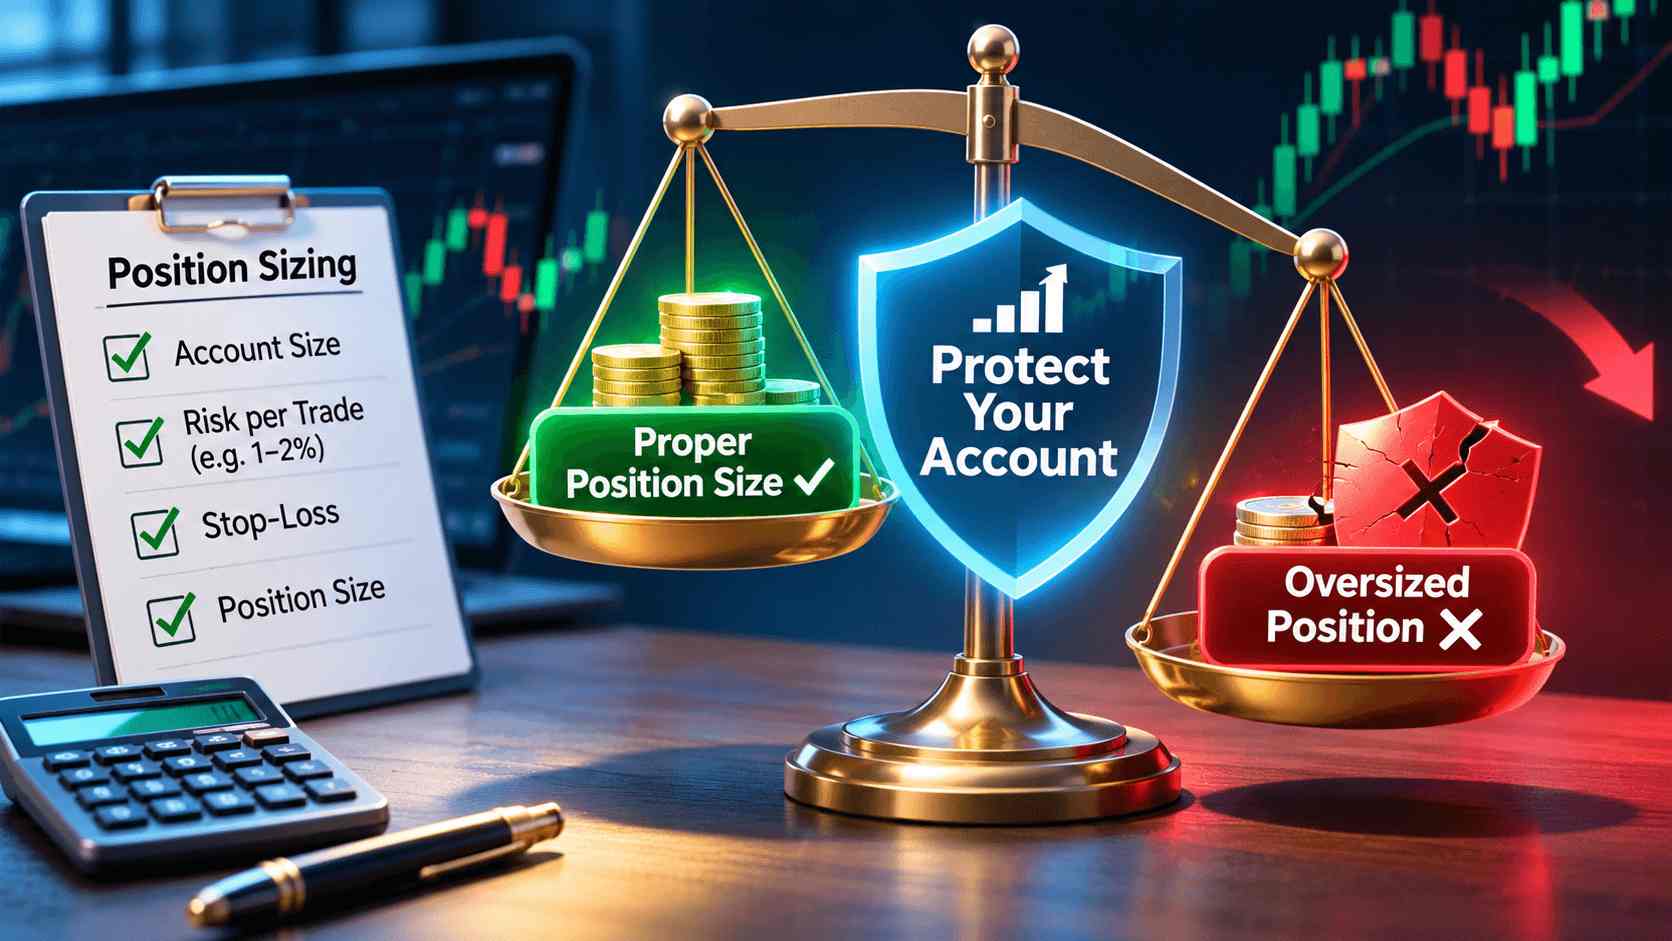
Position sizing is the process of deciding how many lots or units to trade so that, if your stop loss is hit, you lose only a fixed and affordable share of your account.
The key idea is that size comes last. You decide where the trade is wrong first, then work out how big the position can be without breaking your risk limit.
Many new traders do the opposite. They pick a size that feels right, or use whatever margin is available, and only think about the stop loss afterwards.
That approach turns every trade into a gamble on the size of the loss. Proper sizing makes the loss known before the trade is even placed.
Why One Bad Trade Can Blow an Account
The maths of losses is brutal, and it works against traders who size too big. A loss of 10% needs an 11% gain to recover, but a loss of 33% needs a gain of about 50% just to break even.
Large losses are also more likely than they look. In 2023 to 2024, 68% of retail clients who traded CFDs in Australia lost money, according to ASIC data.
October 2026 has shown how quickly markets can turn. South Korea's Kospi fell more than 7% in a single session, a move that would have punished any oversized position in Asian tech.
Swings like that are not rare events to plan around once a year. They happen often enough that every position needs to survive one without ending the account.
The 1% Rule: How Much Should You Risk Per Trade?
The most widely used guideline is to risk no more than 1% to 2% of your account on any single trade. On a $50,000 account, 1% means a maximum loss of $500 per trade.
That limit sounds small, but it is what keeps a trader in the game. Ten losing trades in a row at 1% would leave the account down less than 10%.
At 33% per trade, just three losses in a row would leave the account down about 70%. The difference is not skill or strategy, only size.
A fixed percentage also adjusts automatically. As the account grows, the dollar risk grows with it, and after losses, the risk shrinks to protect what is left.
How to Size a Position in Three Steps
Position sizing follows the same three steps for every market. The order matters, so it is worth following them exactly.
Step 1: Set your risk amount
Decide the maximum dollar amount you are willing to lose. Using the 1% rule on a $50,000 account, that figure is $500.
Step 2: Place your stop loss where the chart says
Put the stop at a level that proves the trade idea wrong, such as just below a recent swing low for a long trade. Never move the stop closer simply to allow a bigger position.
Step 3: Adjust the size until the loss matches
Change the number of lots until the loss at your stop equals your risk amount. The basic formula is risk amount divided by the loss per lot at your stop.
Most platforms now show the estimated loss at the stop before you trade. That makes step three a matter of adjusting the lots until the number on screen matches your limit.
Worked Example 1: Sizing an AUD/USD Trade
The first example is a long trade on AUD/USD, using a demo account with $50,000. The entry price is 0.70322.
The stop loss goes at 0.68800, just below the October lows. If the price falls through that level, the case for a rebound has failed.
The take profit sits at 0.72500, just under the September high. That gives a risk to reward ratio of 1.43, meaning the trade aims to make $1.43 for every $1 risked.
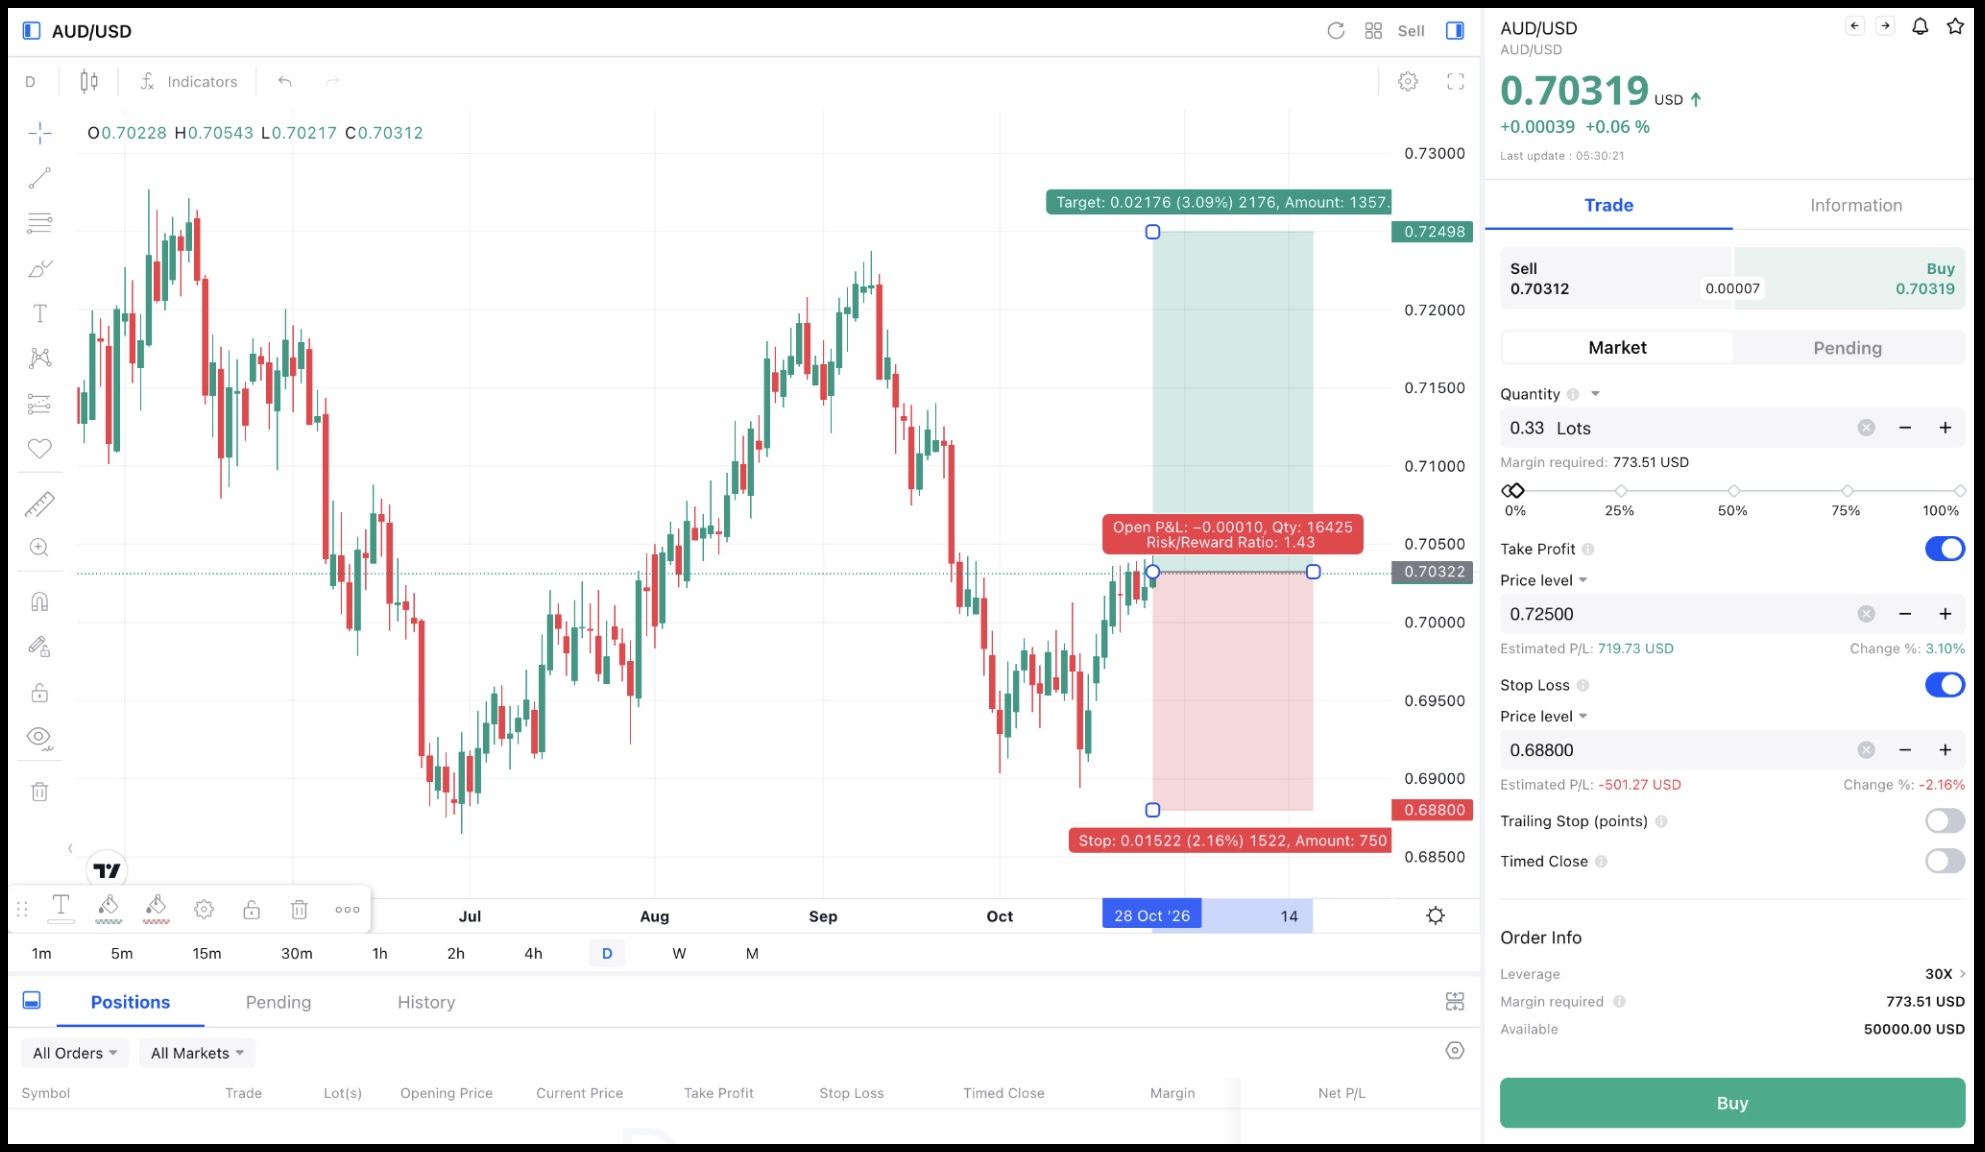
Image: Mitrade (AUD/USD Daily Chart and Order Screen, 0.33 Lots)
At 0.33 lots, the order screen shows an estimated loss of $502.26 if the stop is hit. That is almost exactly 1% of the account.
The estimated profit at the target is $718.74. The margin required is only $773.55, about 1.5% of the account.
That last number is important. The trade uses very little margin, but the risk is controlled by the stop and the lot size, not by the margin.
“Trade AUD/USD with an ASIC-regulated broker. Fast AUD funding via PayID. ”
Worked Example 2: Sizing a Gold Trade With a Wider Stop
The second example is a long trade on gold, using the same account and the same $500 risk limit. The entry price is 4,035.96.
The stop loss goes at 3,965, just below a recent swing low near 3,980. The take profit sits at 4,180, just under resistance around 4,200, for a risk to reward ratio of 2.1.
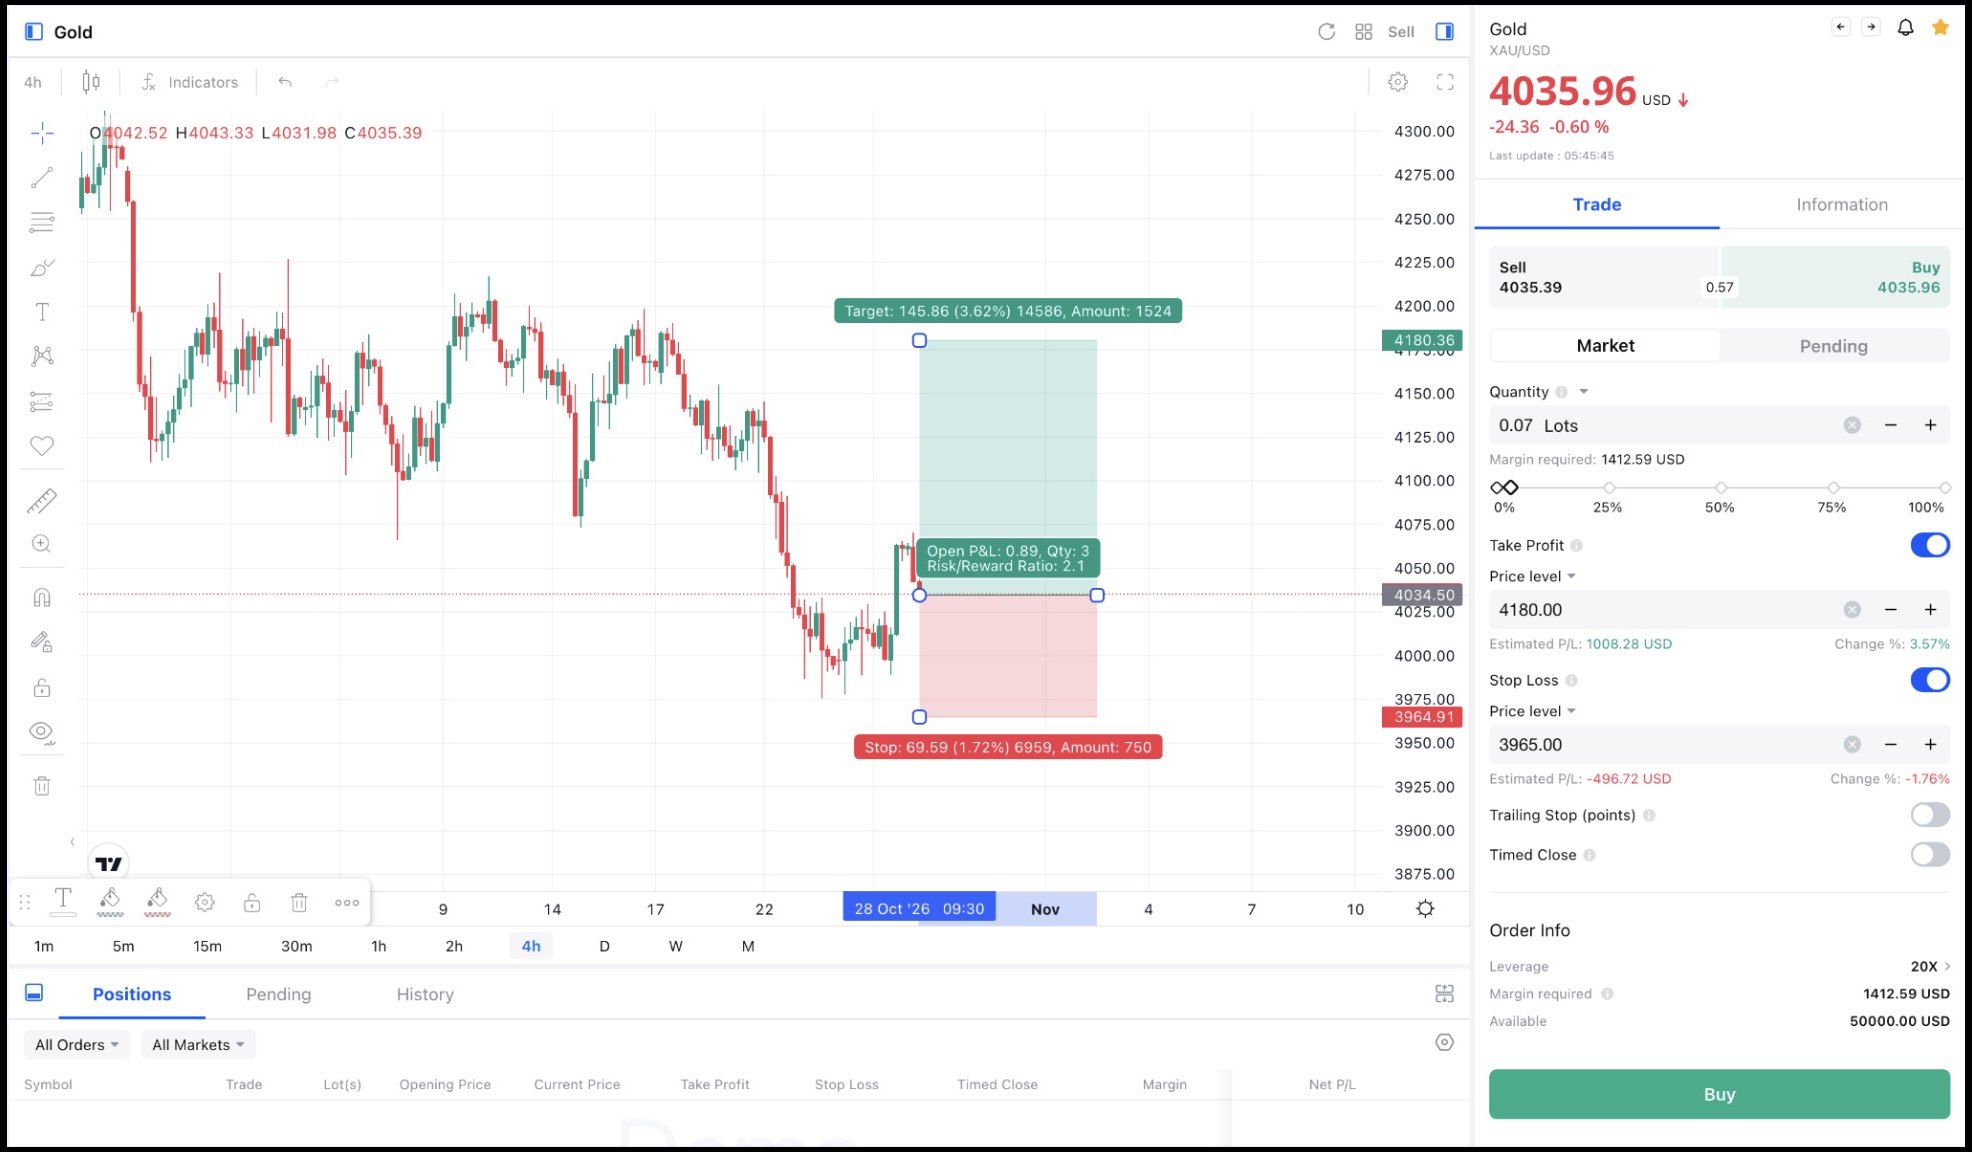
Image: Mitrade (XAU/USD 4 Hour Chart and Order Screen, 0.07 Lots)
At 0.07 lots, the estimated loss at the stop is $496.72. The estimated profit at the target is $1,008.28.
Gold moves in much larger dollar amounts than AUD/USD, so each lot carries far more risk. That is why the same $500 limit allows only 0.07 lots here, compared with 0.33 lots on AUD/USD.
This is the core lesson of position sizing. The dollar risk stays fixed, while the lot size changes to fit each market and each stop.
“Trade Gold CFDs with an ASIC-regulated broker. Fast AUD funding via PayID. ”
The Same Trade, Oversized
Now take the AUD/USD trade from the first example and change only one thing. Instead of sizing from the stop, use the margin slider to commit half of the account.
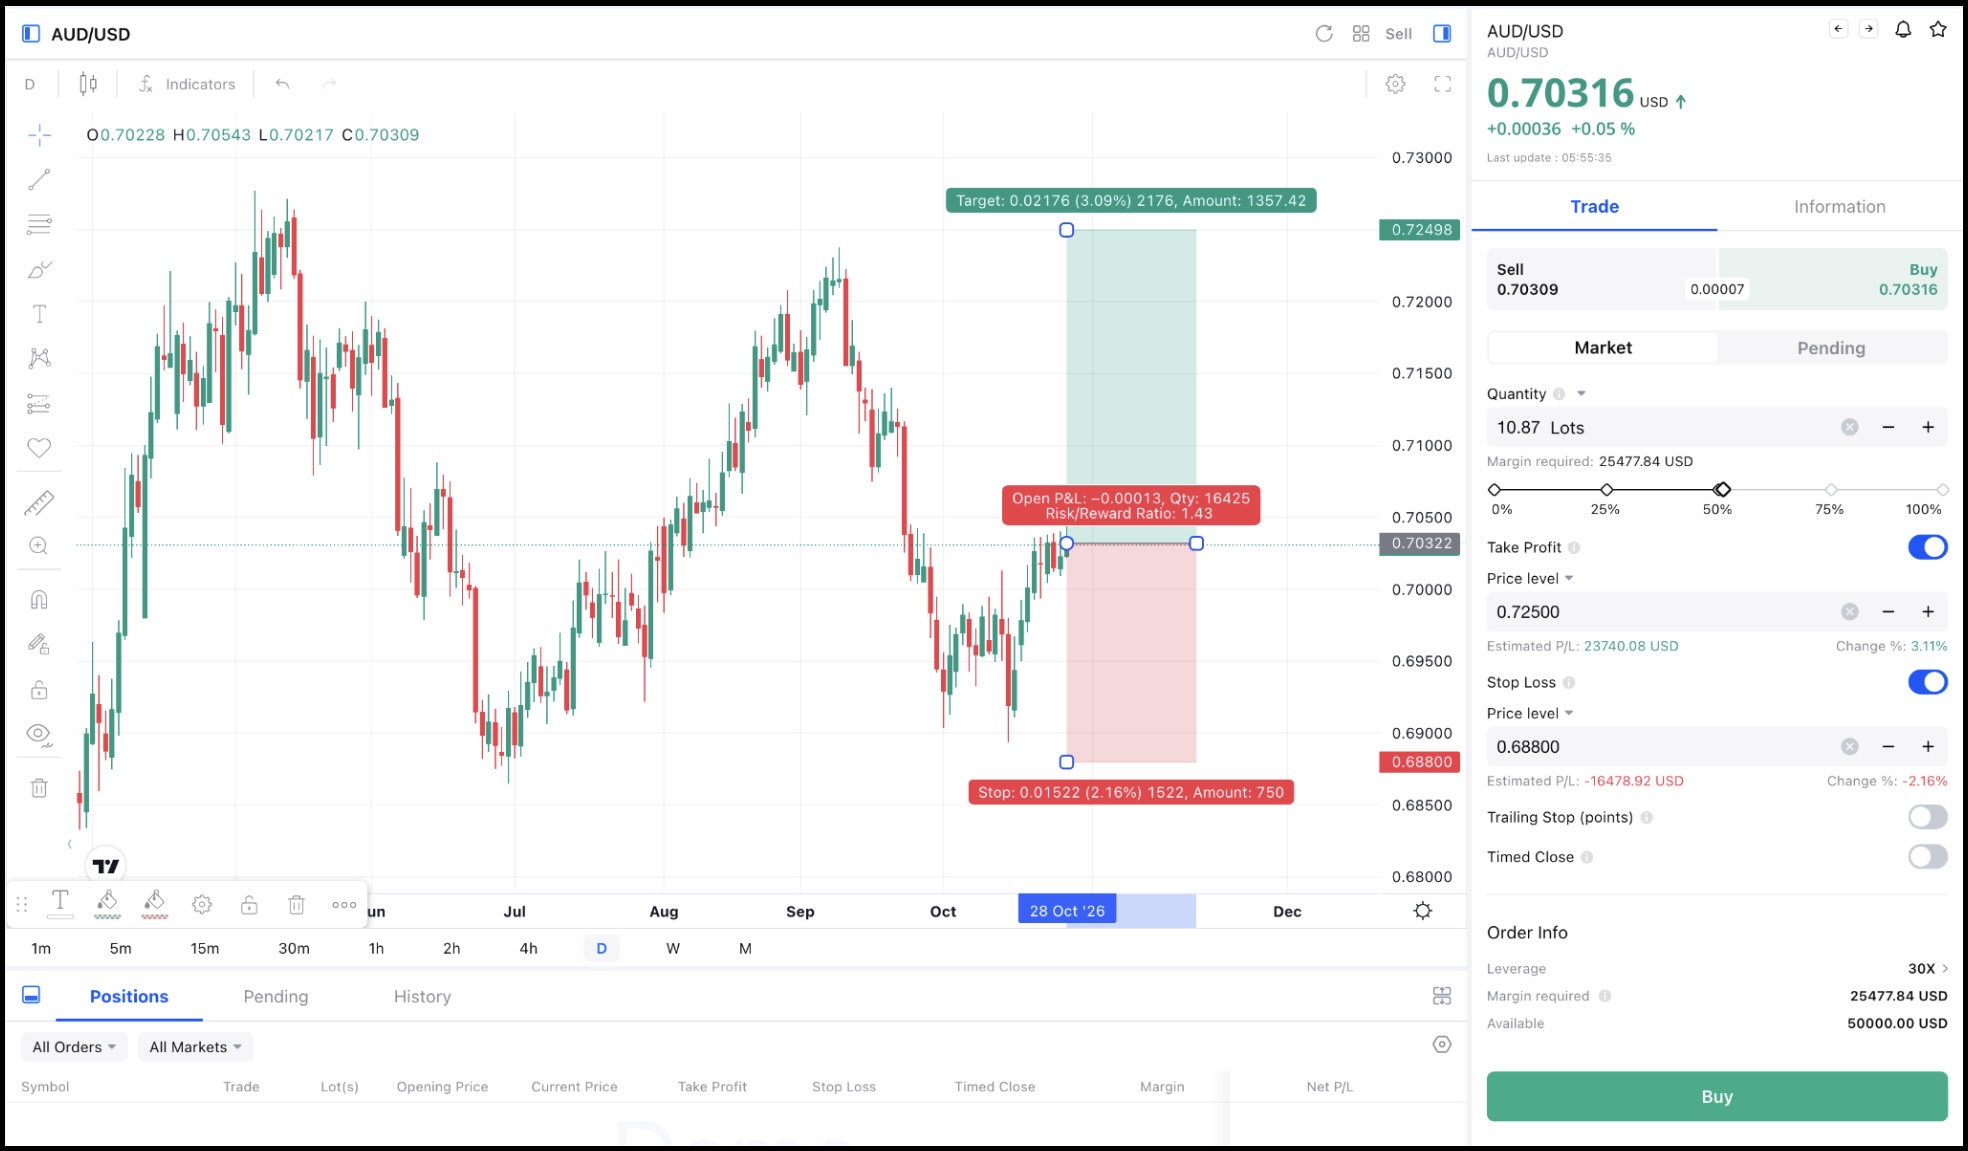
Image: Mitrade (AUD/USD Order Screen, 10.87 Lots)
The chart, the entry and the stop are identical. The position size jumps to 10.87 lots, and the margin required climbs to $25,485.44.
The estimated loss at the stop is now $16,707.19. That is about 33% of the account on a single trade, more than 33 times the loss in the correctly sized version.
If the stop is hit, the account falls to roughly $33,300. Getting back to $50,000 would then need a gain of about 50%.
At the correct size, earning back $16,707 would take more than 33 winning trades of $500 each. One oversized position can erase months of careful trading.
Why Leverage Does Not Change Your Risk
Many traders believe lower leverage means lower risk. In practice, leverage only changes how much margin a position needs, not how much you lose at the stop.
The AUD/USD order screen showed 30X leverage, while the gold screen showed 20X. Those levels reflect ASIC's caps of 30:1 on major currency pairs and 20:1 on gold.
In both trades, the loss at the stop depended only on the lot size and the distance to the stop. Higher leverage simply let the same position tie up less margin.
Leverage becomes dangerous when it tempts traders into bigger positions. Available margin is not a target, and using all of it is how the oversized trade above happens.
ASIC's rules add a safety net. Its CFD order standardised margin close outs and protects retail clients from negative balances, meaning a client cannot lose more than the funds in their account.
That protection limits the worst case, but it does not stop an oversized trade from emptying the account. Correct sizing is still the trader's job.
Risk to Reward and Win Rate: Making Sizing Work
Position sizing works best alongside a sensible risk to reward ratio. Together, they decide how often you need to be right to make money over time.
A trade with a 1.43 ratio, like the AUD/USD example, breaks even with a win rate of about 41%. A trade with a 2.1 ratio, like the gold example, breaks even at around 32%.
That means a trader can be wrong more often than right and still grow the account. It only works if every loss is kept to the same small, fixed size.
When the chart limits the reward, as the September high did for AUD/USD, the trade needs a higher win rate to pay off. Some traders skip setups below 1.5, while others accept them when the level is strong.
Common Position Sizing Mistakes
Even traders who know the rules often break them in the moment. These are the mistakes that cause the most damage.
Moving the stop closer to fit a bigger position, which leaves the trade no room to breathe.
Using the same lot size on every market, ignoring that gold and forex move by very different amounts.
Sizing up after a losing streak to win money back quickly.
Holding several trades on related markets, which stacks the same risk more than once.
Ignoring the spread and overnight gaps, which can make losses slightly larger than planned.
The fix for all of them is the same. Decide the risk first, place the stop where the chart says, and let the size follow.
How to Size Positions on Mitrade
Mitrade's order screen makes the three step method easy to follow. After choosing the market, switch on the stop loss and enter your stop price.
The estimated profit or loss appears directly under the stop level. Adjust the quantity with the plus and minus buttons until that figure matches your risk limit.
A quick shortcut speeds things up. Divide your risk amount by the estimated loss shown at one lot, and the result is the lot size to enter.
The margin slider can then stay at zero. It is designed to size by margin, which is exactly the habit that produced the oversized trade in this guide.
New traders can practise on a free demo account before risking real money. The examples in this guide were built on a demo account with $50,000 in virtual funds, so every step can be repeated at no cost.


You might be interested in…
1. How much should I risk per trade?
Most traders risk 1% to 2% of their account on each trade. On a $50,000 account, 1% means a maximum loss of $500 if the stop is hit.
2. How do I calculate position size?
Divide your risk amount by the loss per lot at your stop loss. Many platforms show the estimated loss at the stop, so you can adjust the lots until it matches your limit.
3. Does leverage increase my risk?
Leverage enables larger market exposure with a small amount of capital, and even a small market movement can magnify profits and losses.
4. Why are gold positions smaller than forex positions for the same risk?
Gold moves in larger dollar amounts per lot than most currency pairs. The same dollar risk therefore allows fewer lots on gold than on a pair like AUD/USD.
5. What happens if I lose 33% of my account?
A 33% loss needs a gain of about 50% just to get back to where you started. That is why keeping every loss small matters more than any single winning trade.
6. Can I practise position sizing on Mitrade?
Yes. Mitrade is regulated by ASIC and offers a free demo account with virtual funds, where you can test position sizing on forex, gold and other CFDs.
Disclaimer: The content presented above, whether from a third party or not, is considered as general advice only. CFD trading involves significant risk of loss. Past performance does not guarantee future results. This article serves informational purposes only and does not constitute financial advice. Consider your risk tolerance before trading.


